Just as you design or troubleshoot circuits, understanding hysteresis helps you predict behavior when inputs cross thresholds; hysteresis creates stable switching thresholds that prevent oscillation and improve noise immunity, yet excessive hysteresis can cause latching, distortion, or component stress, so you must size it for performance and safety; this guide shows how hysteresis arises in comparators, relays, and magnetic cores and how to model and apply it to optimize your designs.
Understanding Hysteresis in Electronic Components
Definition of Hysteresis
When you look at a component’s transfer curve, hysteresis shows up as a difference between the rising and falling thresholds – classic examples are the V_T+ and V_T- of a Schmitt trigger or the B-H loop of a magnetic core where the loop area represents energy loss per cycle. In practical electronics the hysteresis width can span from a few millivolts in precision comparators (10-100 mV typical) to several volts in digital input buffers and a few degrees in thermal controls (thermostats often use 1-5 °C of deadband).
You can model hysteresis as positive feedback that creates a bistable region (a deadband) or as a rate-dependent phenomenon where slew rates and frequency reshape the loop. Characterization usually measures rising/falling thresholds, loop width, and temperature dependence; many precision comparators show only a few tenths of a percent drift per °C, while op‑amp based designs can introduce additional delay and frequency dependence that you must account for in high-speed applications.
Importance of Hysteresis in Circuit Design
You rely on hysteresis to stabilize noisy inputs and eliminate unwanted switching: for example, if your signal rides on ±20 mV of noise you should design a hysteresis band >40 mV so the comparator doesn’t chatter. In switch debouncing, signal conditioning, and level‑detection tasks hysteresis prevents oscillation and false triggers, improving reliability and reducing EMI and component stress.
At the same time, you must balance sensitivity against stability: excessive hysteresis reduces resolution and can mask early fault conditions, degrading closed‑loop performance in PID controllers and allowing thermal or mechanical overshoot; conversely, too little hysteresis lets chatter increase wear or generate high‑frequency switching. In safety‑critical or power circuits this tradeoff can produce dangerous failure modes if hysteresis is set improperly.
For implementation, the simplest method is positive feedback via a resistor divider: if your comparator output swings 0-5 V and you want ~50 mV of hysteresis, choose a feedback fraction of ≈1% (a ~100:1 divider such as 99 kΩ/1 kΩ as a starting point), then account for input bias currents, output saturation and temperature drift. Always verify on the bench with a slow ramp and oscilloscope to measure V_T+ and V_T- directly and confirm the hysteresis width under real operating conditions; this practical verification prevents surprises in the field.
Types of Hysteresis
You will encounter several practical forms of hysteresis in electronics, each with different causes and failure modes. In circuit design, differentiate between positive hysteresis used intentionally for noise immunity and switching stability, and forms like negative hysteresis or magnetic hysteresis that can cause unexpected behavior or losses.
To help you compare quickly, here are common categories and where they appear in real systems:
- Positive hysteresis – comparators, Schmitt triggers, mechanical switches.
- Negative hysteresis – devices with negative differential resistance, thermal feedback loops.
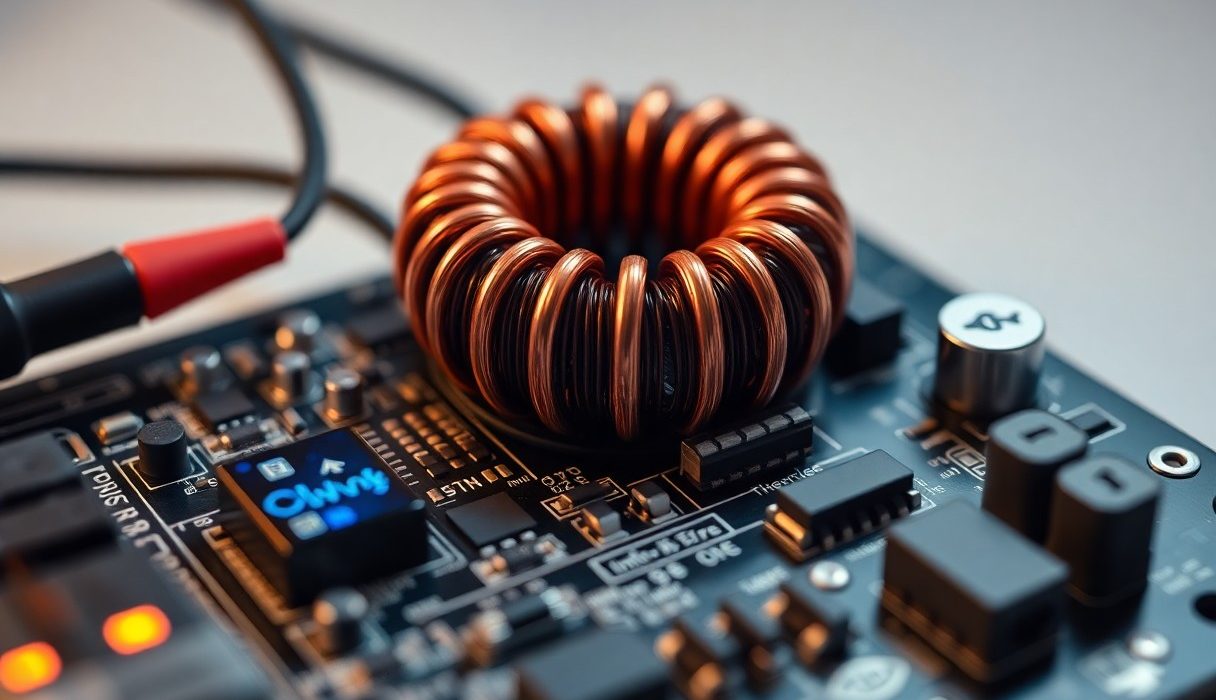
- Magnetic hysteresis – transformers, inductors (core losses measured in mJ per cycle).
- Thermal hysteresis – temperature-dependent threshold shifts in semiconductors.
- Mechanical hysteresis – MEMS, relays, and sensor elements with friction or backlash.
| Type | Typical example / effect |
| Positive hysteresis | Schmitt trigger inputs: threshold separation often ~0.1-0.3·VCC for debounce and noise margin. |
| Negative hysteresis | Tunnel diodes / NDR circuits: direction-dependent I-V path can cause oscillation or latch-up. |
| Magnetic hysteresis | Transformers: core loss measured as area of B-H loop, increases with frequency and flux density. |
| Thermal hysteresis | Power devices: junction temperature shifts thresholds, producing drift or hysteretic cycling. |
Positive Hysteresis
You rely on positive hysteresis when you add intentional threshold separation to prevent chatter and false triggering: a comparator with positive feedback changes its switching point depending on whether the input is rising or falling, so noise within the deadband (often a few hundred millivolts in logic-level designs) is ignored. In practice, a 5 V CMOS Schmitt input can exhibit a rising threshold near ~3.5 V and a falling threshold near ~2.0-2.5 V, giving you a clean margin for mechanical contacts and long cables.
Engineers exploit this by sizing feedback resistors to set the hysteresis band for specific use cases – for instance, increasing the band to 0.5 V reduces false triggers on a sensor with ±200 mV noise, while a tighter 0.1 V band keeps switching latency low. You should tune the band based on noise amplitude, required switching speed, and the positive effect on system stability.
Negative Hysteresis
Negative hysteresis appears when the system’s path on increasing stimulus differs in a way that reduces the effective threshold on reversal, often tied to negative differential resistance or runaway thermal feedback. For example, a tunnel diode’s I-V curve has a valley where increasing voltage reduces current; sweeping forward and backward produces a loop that can drive unintended oscillation if not damped – in circuits this can lead to spurious oscillators or unstable bias points.
When you design around components that can produce negative hysteresis, include series resistance, snubbers, or thermal management: adding 10-100 Ω series resistance and a 10-100 nF snubber often damps parasitic oscillations, and ensuring junction temperatures stay within specified ranges prevents threshold shifts that exacerbate the effect. Pay special attention to devices used near their rated limits, since the magnitude of the hysteresis loop can increase markedly as you approach thermal or current limits.
The additional risk with negative hysteresis is that it can create fast, hard-to-predict transitions that may damage downstream components or cause EMI issues if not mitigated by design measures such as damping, controlled bias networks, or explicit hysteresis inversion circuits.
Factors Influencing Hysteresis
Your circuit’s observed hysteresis is a product of many interacting variables: material behavior, topology, operating frequency, and environmental conditions all shift threshold positions and loop area. For example, in ferromagnetic cores the loop area directly maps to energy loss per cycle (often several J/m³ for soft steels at 50 Hz), while in comparators the hysteresis window is set by the fraction of positive feedback multiplied by the output swing. Field experience shows that a comparator with ±5 V swing and a feedback fraction of 0.1 will produce thresholds roughly ±0.5 V from the reference, a simple way you can tune noise immunity versus switching precision.
- Material Properties – magnetic coercivity, permeability, trapping sites in dielectrics
- Circuit Configuration – feedback fraction, divider ratios, comparator/op‑amp output swing
- Frequency and Rate Effects – eddy currents, skin depth, RC time constants
- Temperature – shifts in threshold, carrier mobility, and Curie points
- Manufacturing & Aging – residual stresses, oxide traps, contact degradation
When you diagnose hysteresis you must weigh each factor: a sensor that shows ±100 mV hysteresis at 1 Hz may behave very differently at 1 kHz due to parasitic capacitance and eddy losses, and the same board in a 100°C oven will commonly shift thresholds by tens to hundreds of millivolts. Assume that you are designing a Hall sensor front end with a ferrite core and a Schmitt comparator, the final hysteresis will be the convolution of the core’s remanent magnetization behavior and the comparator’s feedback‑set thresholds.
Material Properties
In magnetic components you should inspect coercivity, permeability, and loop shape: soft magnetic alloys and ferrites used in transformers and inductors typically have coercivities in the range of 10-100 A/m, producing narrow loops and low hysteretic loss, while hard magnetic materials show coercivities in the kiloampere per meter range and very wide loops suitable for permanent magnets. The Curie temperature is a hard limit – iron’s Curie point near 770°C is a concrete example – and as you approach that regime permeability collapses, which dramatically changes hysteresis behavior and can cause functional failure in sensors and actuators.
For semiconductors and dielectrics, you will see hysteresis from charge trapping and defect states: MOSFET threshold shifts of tens to hundreds of millivolts are common after stress or bias-temperature cycles, and EEPROM/Flash intentionally use threshold hysteresis of several volts to store data. In precision designs you need to quantify trap densities and thermal coefficients; for instance a silicon diode’s forward drop typically shifts by about −2 mV/°C, so a 50°C change moves thresholds by roughly 100 mV and will alter any hysteresis window that depends on those voltages.
Circuit Configuration
Positive feedback is how you usually create deterministic hysteresis: the hysteresis width equals the feedback fraction times the amplifier’s output swing, so if your comparator swings 0-5 V and the divider returns 10% of the output, you’ll get thresholds spaced by about 0.5 V. You should explicitly calculate thresholds from the divider equation – Vth_high = Vout_high × Rlow/(Rhigh+Rlow) – and run the numbers for both output rails so you know the exact switching points rather than estimating them from component values alone.
Rate and frequency matter: if your feedback network includes an RC time constant (for debouncing or filtering) the effective hysteresis becomes input‑rate dependent. For example, an RC = 10 ms with a 1 V/µs input slew will produce dynamic offsets on the order of 10 mV-100 mV compared to a static threshold, and at higher frequencies eddy currents in magnetic cores increase core loss and widen the apparent hysteresis loop.
Thermal and supply interactions can create unintended hysteresis that you must guard against: a power MOSFET whose Rds(on) increases by ~20% between 25°C and 125°C can shift current-sharing or protection thresholds enough to latch a regulator off or on, so you often add snubbers, thermal compensation, or deliberate hysteresis margins to prevent thermal runaway from becoming a persistent latch condition.
Pros and Cons of Hysteresis
When you analyze circuit behavior under changing inputs, hysteresis often appears as a built-in stabilizer that trades responsiveness for predictability. In switching applications it can eliminate chatter by enforcing a defined switching window; for example, a Schmitt trigger with a 200 mV hysteresis prevents a comparator from toggling at small input noise levels that would otherwise cause high-frequency oscillation. At the same time, the same hysteresis can introduce steady-state offsets and delays that matter in high-precision or fast-feedback systems.
Practical designs balance those trade-offs: thermostats commonly use 0.5-2.0 °C hysteresis to avoid short-cycling compressors, whereas precision ADC front-ends limit hysteresis to <1 mV to keep converter error budgets low. You should weigh noise immunity, stability, and ease of implementation against added deadband, state-dependence, and potential for limit-cycle behavior when choosing hysteresis magnitude or topology.
| Pros | Cons |
|---|---|
| Reduces switching noise and contact chatter (e.g., Schmitt trigger removes MHz-level chatter) | Introduces deadband that creates a steady-state error (thermostat swing of 0.5-2 °C) |
| Improves stability in digital interfacing by defining clean thresholds | Can delay response time, harming fast-control loops (adds milliseconds to switching) |
| Prevents oscillation in regenerative or feedback circuits | State-dependent behavior complicates analysis and debugging |
| Simple hardware implementation (resistor feedback on comparator) | May require calibration to keep thresholds within tight tolerances |
| Reduces wear from frequent switching (useful in relays and mechanical contacts) | Can produce limit cycles in analog control (motor hunting, audible noise) |
| Helps debounce mechanical inputs without extra filtering circuits | Unwanted hysteresis magnitude can distort sensor readings (offset from true value) |
| Enables predictable hysteretic oscillators for timing (relaxation oscillator) | Complicates multi-sensor fusion where thresholds must match across channels |
| Often tolerant to component tolerances; performance remains stable | Can mask intermittent faults by suppressing symptomatic switching |
Advantages of Hysteresis in Circuits
You get clear benefits when you apply hysteresis deliberately: noise immunity and de-bounce are the most common, turning a noisy analog waveform into a stable digital transition. For example, adding 100-300 mV of hysteresis to a comparator input in automotive sensors reduces false trips from EMI spikes and 50/60 Hz pickup without complex filtering, improving reliability across temperature ranges (-40 to +125 °C).
Additionally, hysteresis improves control-loop robustness by preventing rapid on/off cycling that shortens actuator life. In HVAC systems a 1 °C hysteresis can extend compressor life by a factor of two compared with tight deadbands, and in power converters a small hysteresis band can prevent PWM-induced oscillations at specific load points.
Disadvantages of Hysteresis
You will encounter downsides when hysteresis is too large or applied where precision matters: measurement offset, slower response, and potential for limit cycles are common. In precision instrumentation, even 1 mV of hysteresis in a comparator input can exceed the error budget of an ADC front-end and necessitate tighter component matching or calibration.
Control systems can also suffer: a wide hysteresis band in motor position control may produce oscillatory behavior around the setpoint, manifesting as audible noise or increased wear. In one industrial servo case study, increasing hysteresis to reduce jitter doubled the settling time and required retuning of the PID loop to avoid performance degradation.
Further, hysteresis can hide intermittent faults by suppressing transitions that would otherwise alert you to a failing sensor or contact; this masking effect can be dangerous in safety-critical systems unless you implement diagnostic checks or watchdog mechanisms to detect latched failures.
Step-by-Step Guide to Implementing Hysteresis
| Step | Action & Details |
| 1. Quantify noise and signal | Measure RMS noise on your sensor or input (use oscilloscope FFT or 1000‑sample std. dev.). Set initial hysteresis > 3× noise RMS (example: 5 mV RMS → start at ~15 mV). For temperature sensors, typical thermostat bands are 0.5-2.0 °C. |
| 2. Select topology | Choose comparator + positive feedback (Schmitt) for digital switching, or use op‑amp with intentional deadband for analog loops. Keep feedback resistor values between 10 kΩ and 200 kΩ to balance bias current error and input loading. |
| 3. Calculate thresholds | Compute Vth+ and Vth− from resistor ratios and supply rails; verify offset allowance (comparators often have 1-20 mV offset). Ensure hysteresis > amplifier/comparator offset to prevent unintended toggling. |
| 4. Simulate worst cases | Run SPICE with Monte Carlo (use 1%-2% resistor tolerances and specified input offset drift). Check switching over temperature extremes (example: −40 °C to +85 °C) and supply variations ±5%. |
| 5. Prototype and measure | Apply a slow triangular sweep (0.1-10 Hz) and capture Vh+ / Vh− on the scope; confirm hysteresis = Vh+ − Vh− matches target. Log samples across multiple boards to spot variation. |
| 6. Validate in system | Test under real‑world disturbances: EMI bursts, power brownouts, and mechanical vibration. Track switching rate-if it exceeds expected cycles per minute, adjust hysteresis or add filtering. |
Designing with Hysteresis
When you size the hysteresis band, base it on measurable quantities rather than guesswork: compute the input noise floor and the maximum input drift over temperature, then set the hysteresis at least three times the RMS noise and at least equal to the maximum expected DC offset. For example, if your sensor exhibits ±10 mV drift over temperature and 4 mV RMS noise, choose a hysteresis band of ≥30 mV to keep switching stable across the operating range.
Balance between responsiveness and stability by considering event rate and acceptable latency. Increasing hysteresis reduces nuisance toggles-which improves reliability-but also increases detection latency and may miss brief events; in battery-powered systems aim for the smallest band that still yields stable, chatter‑free switching, often 1-5% of full‑scale for analog sensors.
Testing Hysteresis Effects
Start bench tests with a controlled input: apply a slow, linear ramp (0-5 V at 0.1-1 Hz) and use scope cursors to measure Vth+ and Vth− precisely; calculate hysteresis as their difference. For a comparator with a target hysteresis of 50 mV, confirm measured hysteresis within ±10% across three prototypes-if variation is larger, inspect resistor tolerances and input offset contributors.
Next, stress the design dynamically: inject noise (sinusoid plus Gaussian noise) and run switching at expected event frequencies. Use a logic analyzer or microcontroller to count bounce events; if you see more than one bounce per intended transition, increase the hysteresis band or add small input RC filtering. Also perform temperature sweep tests-record thresholds at −40 °C, 25 °C, and +85 °C to capture drift.
For production validation, automate threshold logging with a DAC sweep and compare distributions across 50-100 units; include Monte Carlo simulation data in the test report and flag units that fall outside the specified hysteresis tolerance. Note that hysteresis smaller than comparator offset or ambient noise can cause persistent oscillation, while excessive hysteresis can lead to missed short events-both outcomes must be quantified during testing.
Tips for Optimizing Hysteresis in Circuits
When tuning hysteresis for a given sensor or comparator, quantify the actual noise and transients first: measure RMS noise and peak-to-peak chatter on the input with a scope (for many PCB-level signals 10-50 mVpp is typical, for thermistors you might see 0.1-0.5°C jitter). Use that measurement to set a hysteresis band at least 3× the standard deviation of the observed switching jitter to minimize false trips without overly degrading response time. Also factor in worst-case temperature drift and supply variation-if your thresholds can shift by ±50 mV over the operating range, design hysteresis wider than that to avoid unintended toggles.
- Use the rule-of-thumb: hysteresis band = 3-5× measured jitter for stable switching.
- Prefer lower-impedance divider networks (10 kΩ-100 kΩ) to reduce susceptibility to leakage and noise pickup.
- Simulate with SPICE and validate with 1,000+ real transitions on the bench to capture statistical behavior.
Component Selection
You should choose comparators and op-amps based on input common-mode range and output stage rather than brand alone; for single-supply 3.3 V systems, select parts with rail-to-rail inputs such as the MCP6001 family, or use dedicated Schmitt trigger ICs (e.g., 74HC14) for clean logic-level hysteresis. Pay attention to propagation delay and output drive: a slow, high-gain op-amp can introduce oscillation when combined with stray capacitance, so specify devices with specified response for your switching frequency-comparator propagation delays under 100 ns are common in fast systems, while some op-amps may be in the microsecond range.
Choose resistor tolerances and temperature coefficients to match your accuracy goal: for threshold stability within ±0.5% use 0.1% metal-film resistors, and select capacitors with stable dielectric (C0G/NP0) if you rely on RC timing to shape hysteresis. Layout matters: place feedback and divider traces short and shielded, decouple supplies within 10 mm of the comparator, and avoid large series resistances that create unwanted RC poles; for example, a 1 MΩ series with 100 pF yields a 1.6 kHz pole that can slow transitions and promote metastability.
Adjustment Techniques
You can implement hysteresis adjustments either in hardware-using trim potentiometers or switchable resistor networks-or in firmware by introducing digital hysteresis around ADC readings. For a 12-bit ADC at 3.3 V, one LSB is ~0.8 mV, so a 4-LSB hysteresis equals ~3.2 mV; that gives you a concrete target when mapping analog noise to ADC counts. Hybrid approaches work well: use a coarse hardware hysteresis to remove chatter and add fine digital hysteresis in software to adapt to changing noise floors.
When tuning on the bench, capture 1,000-5,000 switching events and compute mean and standard deviation; then set the hysteresis margin to >3σ. For mechanical switches and low-frequency inputs, add debounce timing (e.g., 5-50 ms) in addition to amplitude hysteresis to avoid repeated transitions. In high-speed designs, you should also examine the closed-loop stability-if you increase feedback to widen hysteresis, verify phase margin with Bode plots or time-domain step tests to avoid ringing.
For more advanced control, implement adaptive hysteresis that scales with measured noise or signal slope: increase the hysteresis band during high-noise intervals (motor startup, EMI bursts) and narrow it again when the environment is calm, which preserves responsiveness without sacrificing robustness. Perceiving the trade-offs between response time and stability will help you choose an optimal hysteresis width.
Final Words
To wrap up, you should view hysteresis as a predictable memory effect that governs how components respond to changing inputs, and you can use it to improve stability and noise immunity in designs like Schmitt triggers or mitigate its effects where it causes lag and energy loss in magnetic cores. By understanding loop shape, coercivity and remanence, you gain insight into switching thresholds, power dissipation and temperature dependence in sensors, relays and inductors.
When designing or debugging, you can measure hysteresis curves, simulate transient behavior, select materials and topologies to tune the effect, and apply calibration or compensation where precision is required. Applying these steps lets you balance stability, speed and efficiency to meet your system goals.