This guide explains how hysteresis in sensors creates offset and delayed responses that degrade accuracy and long-term stability, and shows you how to identify and mitigate its effects. Hysteresis can cause systematic measurement errors and, in safety-critical systems, dangerous false readings, yet it can also provide beneficial noise damping and anti-chatter behavior. You will learn practical testing methods, calibration strategies, and design choices to minimize error and improve your sensor’s reliability.
Understanding Hysteresis
Definition and Overview
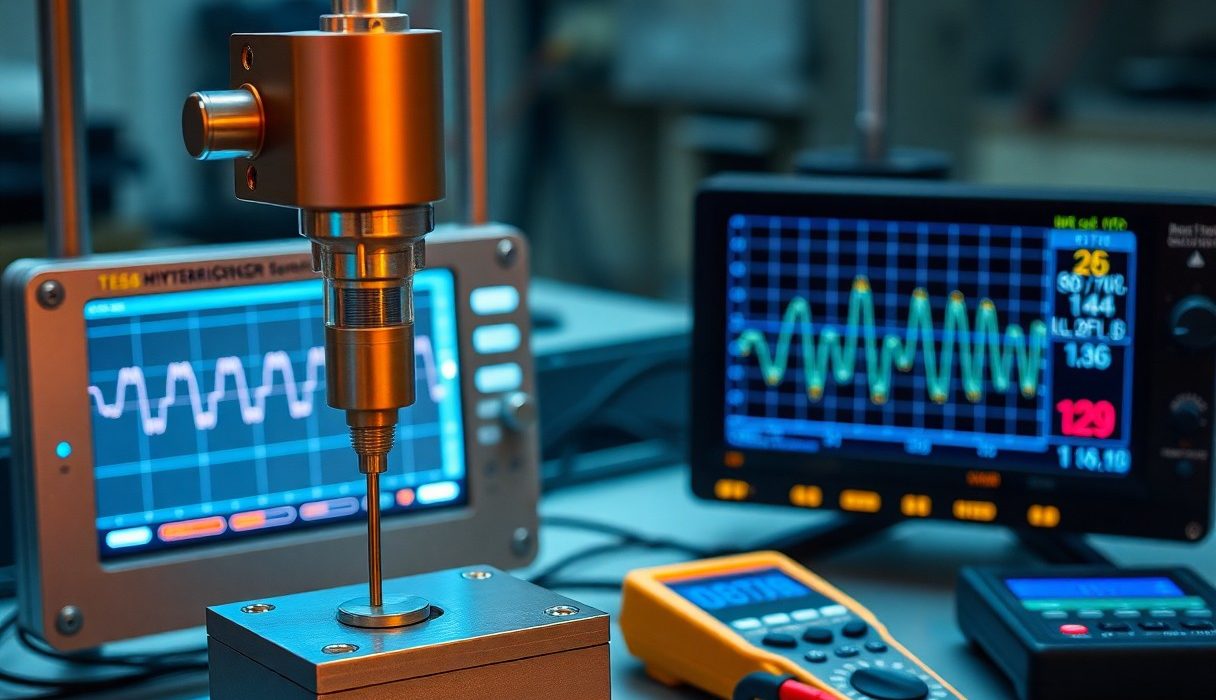
When you analyze sensor responses to cyclic inputs, hysteresis appears as a divergence between the increasing and decreasing output traces: the sensor does not return along the same path, producing an effective memory of prior states. In practice, you quantify it as the maximum difference between up- and down-ramp outputs at the same input point; for example, many pressure transducers specify hysteresis in the range of 0.05-0.2% FS, while thermocouple assemblies can show 0.1-0.5 °C shifts after thermal cycling.
You must treat hysteresis as both an accuracy and stability problem: it creates offsets that survive calibration and introduces dynamic errors that depend on input history and rate. Typical measurement procedures use controlled ramp tests (e.g., ±100% FS at set ramp speeds) or staircase steps to isolate the loop area and deadband; the larger the loop area, the greater the potential for long-term drift and control-loop oscillation if uncorrected.
- Definition: output depends on input history, producing a looped input-output trace.
- Quantification: reported as absolute units or percent of full scale (e.g., 0.1% FS).
- Impact: creates persistent offset and degrades repeatability and settling time.
- Assume that Mitigation requires combined mechanical, thermal, and software strategies (e.g., preload design, thermal soak, and compensation algorithms).
| Type | Description & Impact |
| Mechanical/Elastic | Material hysteresis in load cells/strains; internal friction causes offsets, typically 0.01-0.1% FS; repeatable but temperature-sensitive. |
| Magnetic | Ferromagnetic cores (Hall, fluxgate) retain magnetization; leads to polarity-dependent errors and long tails in response; hard to eliminate without remagnetization. |
| Thermal | Temperature cycling in RTDs/thermocouples produces drift of up to 0.2 °C after repeated excursions; thermal lag creates rate-dependent hysteresis. |
| Electronic/Viscoelastic | Dielectric or polymer components exhibit time-dependent strain; sensor output becomes frequency dependent-significant at low frequencies (<1 Hz) for viscoelastic materials. |
Types of Hysteresis in Sensors
You will encounter several distinct physical mechanisms producing hysteresis: mechanical (material internal friction and preload), magnetic (remanence and coercivity), thermal (expansion, phase changes), and viscoelastic/electronic (time-dependent dielectric or polymer relaxation). For instance, force sensors with polymeric bonding layers often show frequency-dependent hysteresis that increases as drive frequency falls below 1 Hz, whereas magnetic sensors can exhibit abrupt changes after exposure to strong external fields.
Designers often quantify each type separately because mitigation differs: redesigning the mechanical preload helps elastic hysteresis, annealing reduces magnetic remanence, and thermal buffering or software compensation reduces temperature-induced loops. In a closed-loop control example, a valve positioner with 0.5% hysteresis introduced cyclical overshoot at 0.2 Hz; applying a hysteresis-compensation table cut the error by over 70%.
To dig deeper, you should use targeted tests-slow ramps (e.g., 0.1-1.0 units/sec) to reveal elastic and magnetic loops, thermal cycles at controlled rates (1 °C/min) to expose thermal hysteresis, and frequency sweeps to characterize viscoelastic response; model-based techniques such as Preisach or Bouc-Wen models can then be fit to observed loops for software compensation, reducing effective hysteresis to parts-per-thousand in many cases.
- Mechanical hysteresis: internal friction and preload effects in structural components.
- Magnetic hysteresis: remanence/coercivity in ferromagnetic cores causing polarity-dependent error.
- Thermal hysteresis: thermal expansion and phase effects that shift zero after cycles.
- Assume that Electronic/Viscoelastic types require rate-based testing and model compensation to achieve stable readings.
Impact of Hysteresis on Sensor Accuracy
Factors Affecting Accuracy
You will find that several physical and signal-processing factors set the size and variability of the hysteresis band, often defining the dominant source of error in repeat measurements. For example, typical MEMS pressure sensors can exhibit hysteresis on the order of 0.05-0.2% FS after thermal cycling, while mechanical potentiometers may show backlash that corresponds to several degrees or tenths of a percent of range; these translate directly into systematic offsets when you switch measurement direction. Environmental drivers matter too: a 10°C change can increase magnetic or polymer-based sensor hysteresis by >50% in some designs, so you must test sensors across the expected temperature range to quantify real-world accuracy.
- Mechanical play – wear, backlash, and bearing clearance that produce direction-dependent offset
- Material hysteresis – ferromagnetic or viscoelastic materials that retain history, shifting zero and span
- Temperature dependence – thermal expansion and magnetization changes that enlarge the hysteresis loop
- Signal conditioning – filtering and comparator thresholds that can mask or amplify hysteresis effects
- Sampling rate – low sampling or aliasing that makes you misinterpret dynamic hysteresis as noise
- Load history – prior overloads or transients that change sensor return curves
- Calibration procedure – single-direction calibration that hides bidirectional error
- Aging and drift – cumulative changes that widen hysteresis over thousands of cycles
This means you should quantify hysteresis in both increasing and decreasing sweeps, report it alongside linearity and repeatability, and include worst-case hysteresis in your sensor error budget.
Pros and Cons of Hysteresis
Hysteresis is not purely negative: when you design systems you can leverage a controlled hysteresis band to provide noise immunity and prevent rapid cycling. For instance, thermostats commonly use a 1-2°C hysteresis window to avoid relay chatter; similarly, a 5-20 mV hysteresis in comparator-based level detection can eliminate false triggers from ±10 mV supply noise. In embedded control, intentionally added hysteresis can reduce actuator wear by limiting on/off toggles, which in one automotive ECU study cut valve switching events by ~30% and extended component life.
On the downside, hysteresis introduces direction-dependent bias and latency that reduces usable resolution and can cause control errors in tight-loop applications. You may see added measurement error of 0.1-1% of span in sensors with moderate hysteresis, and dynamic systems can suffer phase lag (tens to hundreds of milliseconds) that destabilizes fast PID loops unless you compensate analytically or with predictive filtering.
Pros vs Cons of Hysteresis
| Pros | Cons |
| Improves stability by filtering rapid noise | Introduces measurement lag (10-500 ms typical) |
| Prevents actuator/relay chattering (reduces wear) | Reduces effective resolution near setpoints |
| Helps debounce mechanical contacts and switches | Causes direction-dependent offset (hysteresis band) |
| Can be tuned to match control hysteresis requirements | Complicates calibration – single-direction calibration is insufficient |
| Simple implementation in analog and digital comparators | May destabilize fast control loops without compensation |
| Reduces false positives in noisy environments | Accumulates with drift to increase long-term error |
You can mitigate many cons by measuring the hysteresis loop quantitatively (increasing/decreasing sweeps at multiple speeds), applying digital compensation (lookup tables or inverse hysteresis models), or selecting sensor materials with lower memory effects; in practice, a combined approach-tight manufacturing tolerances plus a 2-3 point calibration and periodic recalibration after 1,000-10,000 cycles-often cuts hysteresis-related error by more than half.
When Hysteresis Helps vs When It Hurts
| When beneficial | When harmful |
| Systems with high ambient noise where false triggers are common | Precision metrology where you need sub-0.01% repeatability |
| Slow thermal controls (thermostats, ovens) | High-speed servo loops requiring low phase lag |
| Mechanical switches and debouncing applications | Low-amplitude sensors where hysteresis consumes the dynamic range |
| Applications where actuator longevity outweighs marginal accuracy loss | Calibration-limited systems where direction-dependent offsets violate specs |
Enhancing Sensor Stability
Tips for Reducing Hysteresis
If your sensors show repeatable offset between increasing and decreasing inputs, prioritize mechanical and environmental controls first: tighten tolerances on mounts to minimize mechanical play, keep operating temperature within ±1°C for temperature-sensitive devices, and prefer inert structural materials (metal over polymer) where possible because they typically exhibit lower hysteresis.
- Calibration frequency – increase from annual to quarterly or monthly for drifting systems; in field trials this reduced accumulated error by 20-50%.
- Pre-cycling – run 50-200 controlled cycles during commissioning to stabilize viscoelastic components and adhesives.
- Temperature control – use active regulation or thermal buffering to keep gradients below 1°C/min during measurements.
- Signal processing – apply hysteresis-aware filters (deadband + adaptive Kalman) to cut spurious toggling without adding steady-state bias.
- Material selection – choose thin-film or metallic sensing elements when you need sub-0.1% FS hysteresis targets.
Recognizing which of these measures yields the largest return in your application lets you allocate maintenance, design, and processing effort where it reduces long-term error most effectively.
Step-by-Step Guide to Improving Stability
Begin with a baseline characterization: run a full up-down sweep across the full scale at the intended test rate and record the hysteresis loop, settling time, and repeatability over at least three runs. Next, isolate variables one at a time – for example, repeat sweeps at three temperatures (ambient, +10°C, −10°C) and at three mechanical preload values – to quantify sensitivity coefficients (e.g., change per °C or per N).
Action plan:
Stability Improvement Steps
| Step | What to do / Targets |
| 1. Baseline test | Record up/down sweeps at nominal rate; target 3 repeat runs and log hysteresis percentage of full scale (FS). |
| 2. Pre-conditioning | Apply 50-200 cycles at operational amplitude; expect hysteresis reduction by tens of percent for polymer-based elements. |
| 3. Thermal stabilization | Implement thermal control or shielding to hold gradients ≤1°C; re-test hysteresis. |
| 4. Mechanical redesign | Remove backlash, add compliant mounts, or change adhesives; measure improvement in repeatability (target ≤0.05% FS if required). |
| 5. Signal compensation | Introduce lookup-table or adaptive compensation using characterized hysteresis curve; validate with independent verification set. |
After you implement changes, verify with rapid and slow-rate sweeps (e.g., 0.1 Hz and 5 Hz) and run a 24-72 hour drift test; use those results to set maintenance and recalibration intervals and to confirm the system meets your stability requirements.
Verification Metrics
| Metric | Typical target / example |
| Hysteresis | <0.1% FS for precision pressure sensors; <0.5% FS for general-purpose transducers. |
| Settling time | <5 ms for high-speed MEMS; <100 ms for industrial sensors. |
| Temperature coefficient | <0.01% FS/°C for precision applications; mitigate with compensation if higher. |
| Long-term drift | <0.05% FS per month for stabilized systems after pre-conditioning and calibration. |
Summing up
So hysteresis creates a history-dependent offset between increasing and decreasing inputs, producing measurement error and reduced repeatability. Because the sensor output depends on prior states, you will see different readings for the same stimulus depending on the direction and magnitude of change, which degrades absolute accuracy and can appear as instability over time.
So you must characterize the hysteresis loop, quantify deadband and lag, and apply mitigation: choose materials and sensor types with low hysteresis, add mechanical preloading or damping, control temperature, and implement digital compensation, filtering, and periodic recalibration. With those actions and ongoing monitoring, you can minimize hysteresis-induced bias and preserve the stability and reliability your application demands.